Loader and Writer, IPython nbextensions to easily edit your text.
Coming back to the nice practice of release my own IPython nbextensions, today I will release two extensions I use a lot in my daily workflow: loader and writer, useful extensions to load files into the IPython notebook and to write the content to the same (or another) file.
Note: These extensions were developed some months ago, and probably you can write better versions of them using the new IPython widget infrastructure, but these were nice hacks and they are still useful in th IPython 1.x and 2.x series, so I think they deserve to go public.
I used the IPython notebook a lot, you know that if you are frequently reading my blog. Not only to write blog posts, but also to write other kind of stuff, for instance: code. Some time ago, I used to write code in a plain text editor next to an IPython console, sometimes I used NINJA-IDE because it is a nice and featured platform. But right now, I am developing inside the IPython notebook because it gives me the text editor and the console in one place, with a lot of other useful features. But I will postpone the description of my workflow for some post to come in the future.
I just want to tell you how I easily fixed a missing feature (for now, because it will be present in the future, for sure) in the IPython notebook using nbextensions. The problem was simple, you can use the %load and %write_file magics to load and write files. But I want some minimal user inteface to:
- select which file to load,
- write a cell content to a file with just a click.
So I wrote loader and writer...
loader nbextension use FileReader() capability of modern browsers. The implementation is simple and you can find more complex examples on the web:
function loadFileAsText() {
    var fileToLoad = document.getElementById("fileToLoad_" + i).files[0];
    var fileReader = new FileReader();
    fileReader.onload = function(fileLoadedEvent) {
        var textFromFileLoaded = fileLoadedEvent.target.result;
        IPython.notebook.get_selected_cell().set_text('name: ' + fileToLoad.name + '\n' +
                                                      'type: ' + fileToLoad.type + '\n' +
                                                      'size: ' + fileToLoad.size + ' bytes \n' +
                                                      '---- \n' + textFromFileLoaded);
    };
    fileReader.readAsText(fileToLoad, "UTF-8");
}
So after selecting a cell, I click on the loader button, I get this:
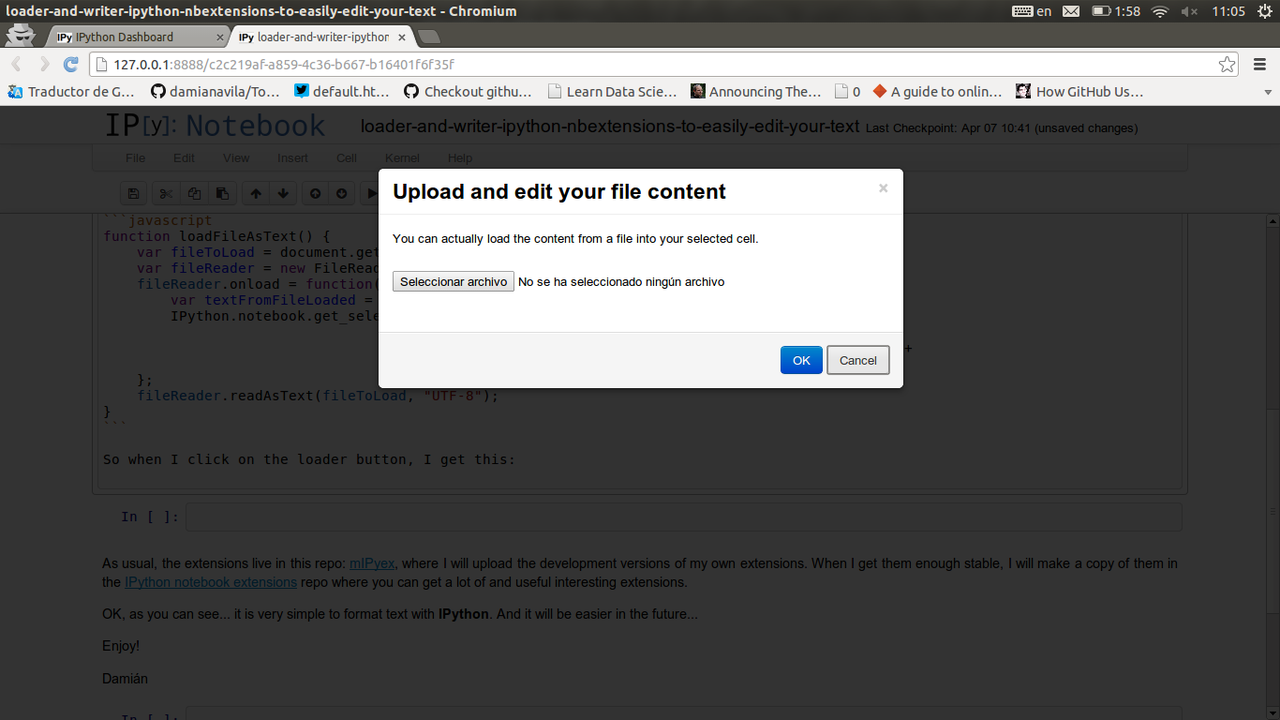
And if I click on Seleccionar archivo (Select file) I can navigate trough my file system to get the file I want to load. For instance, I will load some text, in this case a Bokeh plot, in the next cell:
name: themes.py
type: text/x-python
size: 1055 bytes
----
# -*- coding: utf-8 -*-
import numpy as np
import scipy.special
from bokeh.plotting import *
mu, sigma = 0, 0.5
measured = np.random.normal(mu, sigma, 1000)
hist, edges = np.histogram(measured, density=True, bins=20)
x = np.linspace(-2, 2, 1000)
pdf = 1 / (sigma * np.sqrt(2 * np.pi)) * np.exp(-(x - mu) ** 2 / (2 * sigma ** 2))
cdf = (1 + scipy.special.erf((x - mu) / np.sqrt(2 * sigma ** 2))) / 2
output_file('histogram.html')
hold()
figure(title="Normal Distribution (μ=0, σ=0.5)", tools="previewsave",
background_fill="#E5E5E5")
quad(top=hist, bottom=np.zeros(len(hist)), left=edges[:-1], right=edges[1:],
fill_color="#333333", line_color="#E5E5E5", line_width=3)
# Use `line` renderers to display the PDF and CDF
line(x, pdf, line_color="#348abd", line_width=8, alpha=0.7, legend="PDF")
line(x, cdf, line_color="#7a68a6", line_width=8, alpha=0.7, legend="CDF")
xgrid().grid_line_color = "white"
xgrid().grid_line_width = 3
ygrid().grid_line_color = "white"
ygrid().grid_line_width = 3
legend().orientation = "top_left"
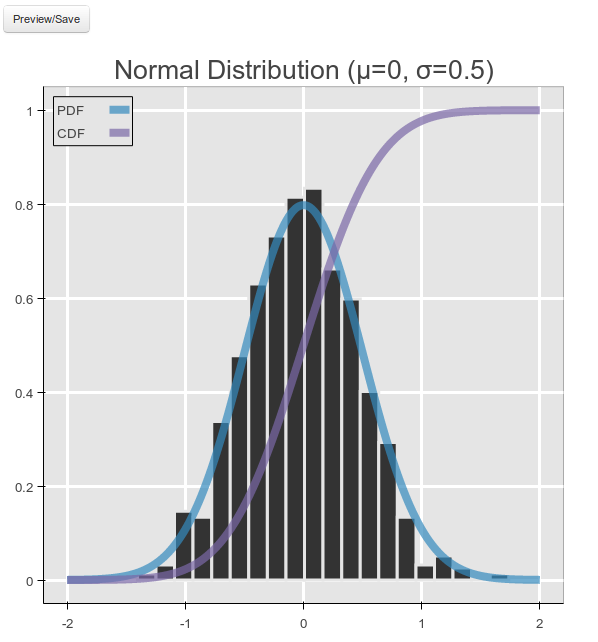
show()
Which gives me this nice plot... but I will post in detail about Bokeh soon ;-)
As you can see, the three first lines of the loaded text give you information about the file itself. Under the ---- rule, you will have the file content. Then, you can do whatever modification you want and write it to a file (the same or another one) using the writer nbextension:
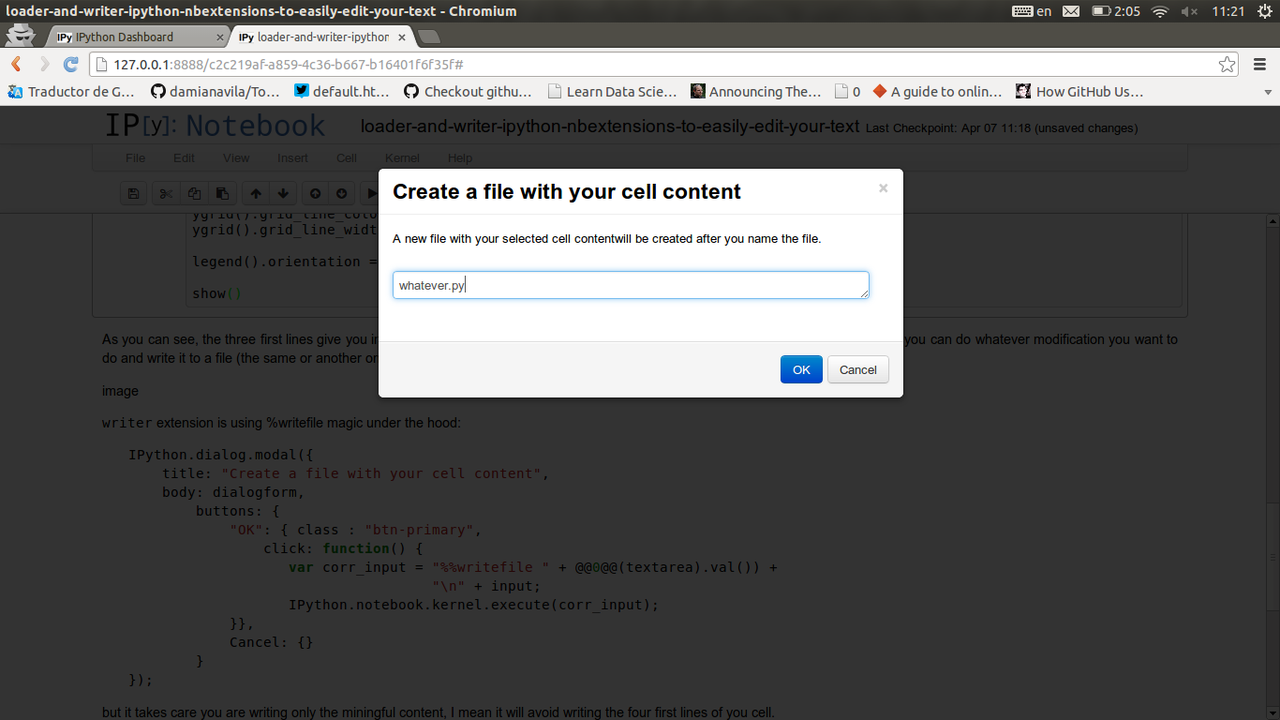
writer nbextension is using %writefile magic under the hood:
IPython.dialog.modal({
    title: "Create a file with your cell content",
    body: dialogform,
        buttons: {
            "OK": { class : "btn-primary",
                click: function() {
                   var corr_input = "%%writefile " + $.trim($(textarea).val()) +
                                    "\n" + input;
                   IPython.notebook.kernel.execute(corr_input);
            }},
            Cancel: {}
        }
});
but it takes care about writing only the miningful content, I mean it will avoid writing the four first lines of you cell.
var preInput = IPython.notebook.get_selected_cell().get_text();
var input = preInput.split('\n').slice(4).join('\n');
As you can see loader and writer work in pairs! And they make the laod, edit and save of any text file really quick and successful. I want to keep this post short, so I will stop here, but you can easily see how these simple extensions can help you a lot in your daily workflow.
As usual, the extensions live in this repo: mIPyex, where I will upload the development versions of my own extensions. You can see the full implementation there. When I get them enough stable, I will make a copy of them in the IPython notebook extensions repo where you can get a lot of and useful interesting extensions.
OK, as you can see... now it is very simple to load, edit an save text with the IPython notebook. And it will be easier in the future...
Enjoy!
Damián
Did you like the content? Great!
Or visit my support page for more information.
Btw, don't forget this blog post is an ipynb file itself! So, you can download it from the "Source" link at the top of the post if you want to play with it ;-)
Comments powered by Disqus